
- Plan
- Pro: Monthly and Yearly
Free shows a locked screen - Capacity
- Up to 500 terms
Each box up to 200 characters - CSV file
- Two columns, UTF-8
Up to 1 MB - During translation
- Up to 20 terms per sentence
- Matching
- Ignores case
Chinese, Japanese and Korean terms also match inside words - Stored
- On your computer
In an encrypted database
How does the glossary work?
Each time a sentence has been recognized, the app looks for your terms in the original sentence (the text the speech recognizer wrote down) and gives the pairs it finds to the translator along with that sentence. If you edit the glossary during a session, later sentences use the new version straight away.
- A hint, not a command. The app states that the translator “may not use them every time”. The glossary makes the right word more likely; it does not guarantee it.
- Case is ignored: “api” matches “API”.
- Latin-script terms match whole words: “AI” matches in “AI’s” but not in “said”.
- Chinese, Japanese and Korean terms also match inside words, because Chinese and Japanese have no spaces between words and Korean attaches particles to words.
- At most 20 terms per sentence. If more match, the app keeps the longer, more specific terms first.
The Free plan cannot use the glossary.
The Glossary screen shows a locked panel that reads “The glossary is a Pro feature: your terms are used when translating.” with an Upgrade to Pro button. To buy a plan, see Buy a plan, activate your key and switch computers; prices are on the pricing page.
Add, edit and delete terms
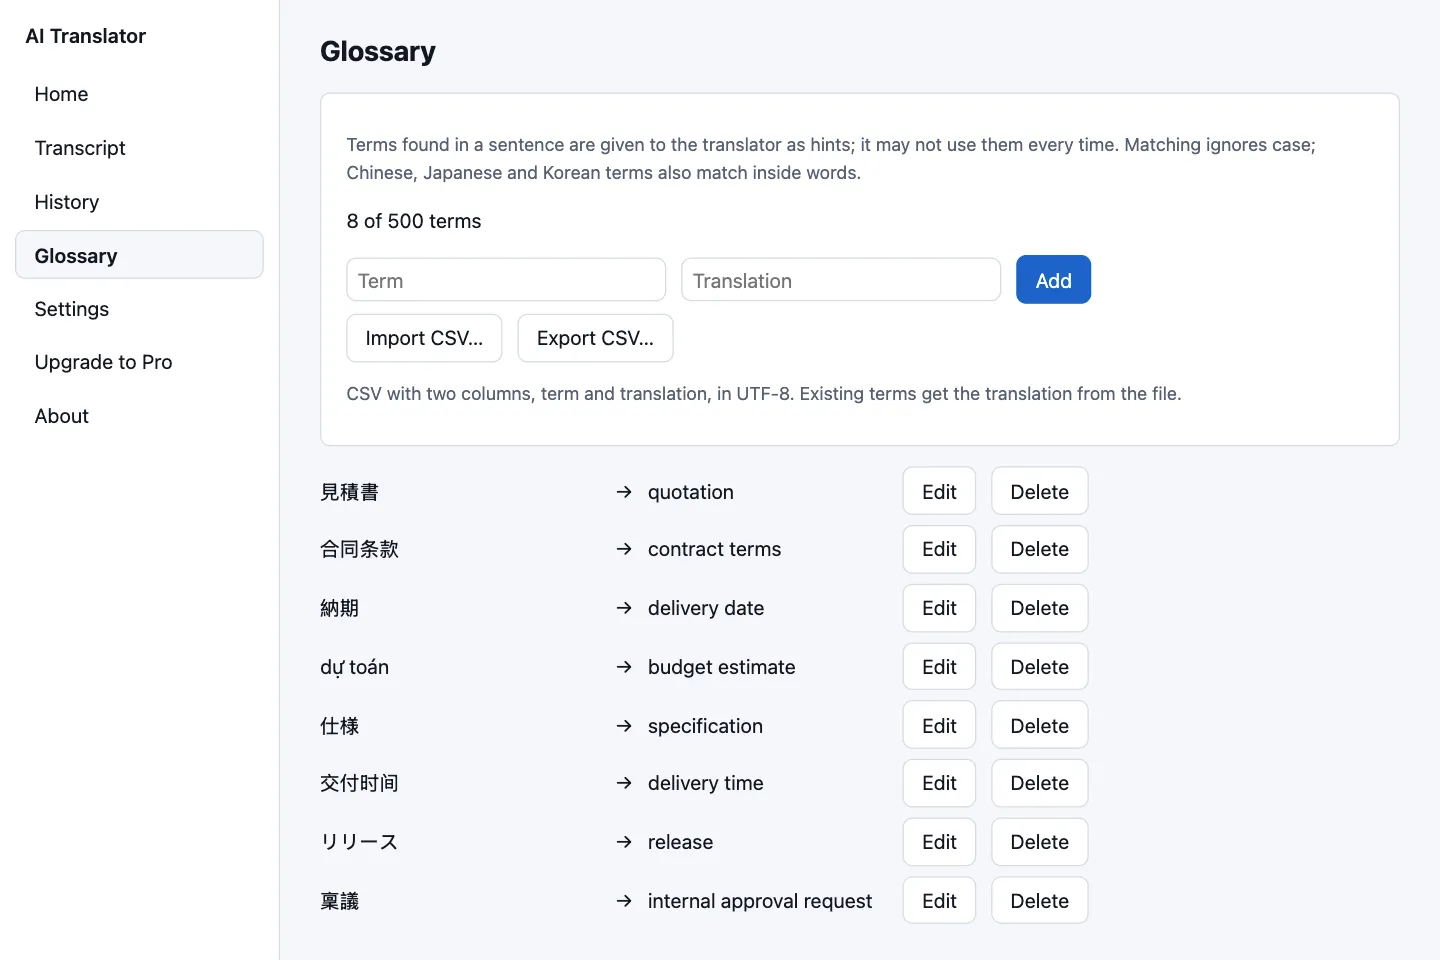
- Click Glossary in the left sidebar. Below the hint at the top, the app shows how many terms you have, for example “8 of 500 terms”.
- Type the source text in the Term box, exactly as speakers will say it, and the translation you want to see in the Translation box. Each box takes at most 200 characters, with no line breaks or tabs.
- Click Add. The new pair appears in the list as “term → translation”.
- To change a pair, click Edit, adjust the two boxes, then click Save (or Cancel). To remove it, click Delete.
Errors appear right under the input row: “Fill in both the term and its translation.”, “Use at most 200 characters.” or “This term is already in the glossary.” (duplicates are detected ignoring case). Once the glossary holds 500 terms, the input row disappears and the app says “The glossary already has 500 terms. Delete some before adding more.”
Import and export CSV
Importing lets you load a long list at once; exporting gives you a backup or a file to edit in a spreadsheet. The file must meet these conditions.
| Requirement | Details |
|---|---|
| Columns | Column 1 is the term, column 2 is the translation. A first row source,target is optional and is skipped on import. |
| Encoding | UTF-8. If your spreadsheet saves in another encoding, the app rejects the file. In Excel, save as “CSV UTF-8”. |
| Size | Up to 1 MB. |
| Each cell | Up to 200 characters, no line breaks. |
Example file content:source,targetAPI gateway,cổng APIburn rate,tốc độ đốt tiền
- Click Import CSV… and choose the file in the system dialog.
- Read the report: “Imported: … added, … updated, … rows skipped, … over the 500-term limit.”
- Added: new terms.
- Updated: terms already in the glossary (ignoring case); the app takes the translation from the file.
- Skipped: rows with a missing column, empty rows, cells over 200 characters or with line breaks.
- Over the 500-term limit: valid rows that did not fit because the glossary is full.
If the file cannot be read, the app says “This CSV file could not be read. Nothing was imported.” and leaves the glossary unchanged; a file over 1 MB is refused with “This file is too large. A glossary file is at most 1 MB.”
Click Export CSV… to save the whole glossary to a file (the button is disabled while the glossary is empty). The exported file starts with source,target and uses UTF-8 so Excel shows accented text correctly. A cell that starts with =, +, - or @ gets a leading apostrophe so a spreadsheet does not treat it as a formula; when you import the file again, the app removes that apostrophe.
How do I write good terms?
- Names: companies, products, people, places. Write the translation you want to see; keeping the name unchanged is fine.
- Abbreviations: use the form speakers use and add an explanation if needed: “SLA” → “service level agreement (SLA)”.
- Industry terms: words the translator tends to render with the wrong sense in your field.
- Write it the way it is transcribed. Run a short session and read the transcript. If a name is always transcribed differently, you can add that spelling as a term too.
- One term, one translation. The glossary is not tied to a language pair, so write the translation in the language you read. If you change the target language on the Home screen, review your translations.
- Short and specific. Avoid very common words such as “meeting” or “project”: they appear in many sentences and rarely need correcting.
Examples
The first column is the direction (the speaker’s language → the language you read). All pairs can live in one glossary: the app only uses a pair when its term appears in the sentence being translated.
| Direction | Term | Translation |
|---|---|---|
| English → Vietnamese | API gateway | cổng API |
| English → Vietnamese | Acme Holdings | Acme Holdings (name kept as is) |
| Chinese → Vietnamese | 增值税 | thuế giá trị gia tăng |
| Korean → Vietnamese | 회의록 | biên bản họp |
| Vietnamese → English | biên bản nghiệm thu | acceptance report |
| Vietnamese → English | Đà Nẵng | Da Nang |
To review what was translated, open the transcript and history. If the glossary does not behave as you expect, see troubleshooting.