Which permission does the app need?
AI Translator captures the audio playing on your computer (meeting sound, a video, a webinar) so it can recognize and translate it. That is why macOS requires the System Audio Recording permission. The app does not use the microphone, does not record your voice, and does not save the meeting to disk: audio stays in memory while it translates. Windows has no such permission step.
- Permission
- System Audio Recording
- Where to turn it back on
- System Settings › Privacy & Security › Screen & System Audio Recording › System Audio Recording Only
- When macOS asks
- The first time AI Translator captures audio: at the “Try it” step or the first time you click Start
The macOS permission prompt
The first time AI Translator captures audio, macOS shows a permission prompt with an explanation that we wrote, in your Mac's language. The English version reads:
AI Translator captures the audio your Mac is playing to show translated subtitles. The audio never leaves your Mac.
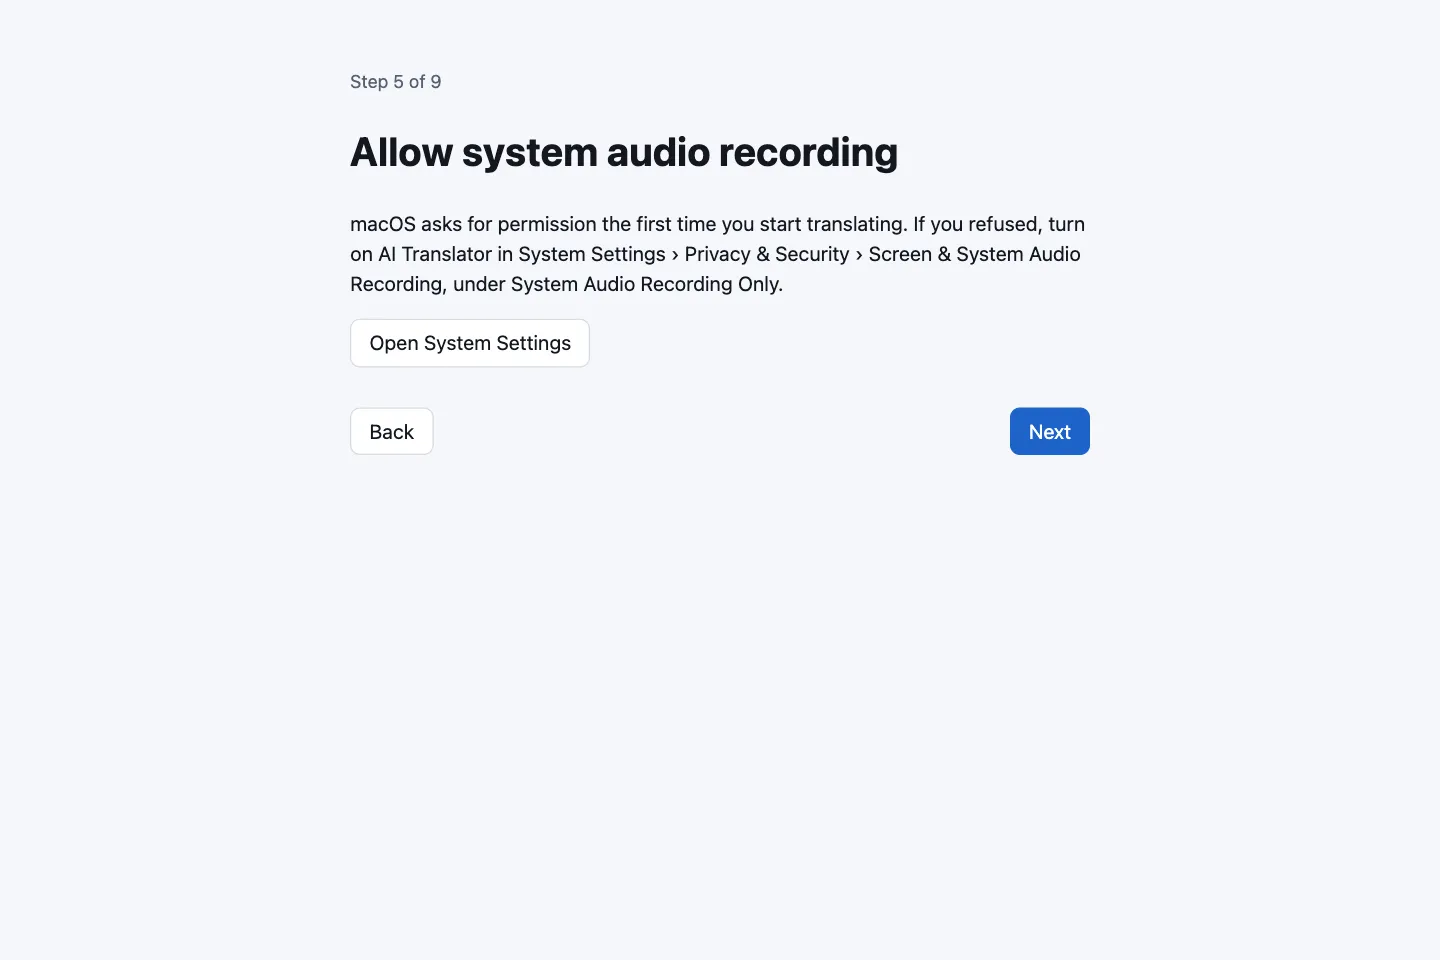
The Vietnamese version reads “AI Translator thu âm thanh máy đang phát để hiện phụ đề dịch. Âm thanh không rời khỏi máy.” Allow it. The app also tells you about it in step 5 of 9 of the first-time setup (see the quick start guide).
If you refused it: turn it back on in System Settings
- In AI Translator, click Open System Settings (it is on step 5 of the setup and on the main screen when the app reports a missing permission). Or open System Settings yourself.
- Choose Privacy & Security, then Screen & System Audio Recording.
- Find System Audio Recording Only and switch on AI Translator.
- Go back to the app, click Start and play something with sound.
If subtitles still do not appear, quit AI Translator completely (choose Quit from its menu bar icon) and open it again. If you do not see AI Translator in the list yet, go back to the app and click Start once (or Play a sample sentence if you are in the setup wizard) so macOS asks for the permission; the app usually appears in the list afterwards, then check again. The names of the items in System Settings may differ a little between macOS versions.
Signs the permission is missing
Without the permission, no subtitles appear even though the meeting has sound, and the “Input level” bar on the main screen stays flat. After a stretch of silence while another app is known to be playing sound, the main screen says:
Nothing is heard although an app is playing sound: AI Translator may not be allowed to record system audio.
It comes with an Open System Settings button. If the session stops because of the missing permission, the main screen says “AI Translator is not allowed to record system audio.” with the same button. Do not confuse these with the general reminder on the subtitle bar, “No audio heard. Check that the meeting sound is playing.”: that only means there has been no sound for a while, which can simply be a quiet meeting.
Why macOS shows no error when you refuse
When permission is denied, macOS still lets the app create the capture source and still reports it as running, but every sample it delivers is silence. With no error to report, AI Translator can only detect a missing permission by waiting for a long silence while another app is playing sound. That is why the warning appears after a while rather than immediately.
After every update, macOS may ask again
The current macOS build is ad-hoc signed, so after each update macOS usually asks once more for this recording permission (along with about 5 Keychain dialogs). Allow it; you lose no data, plan or quota. Details in the macOS installation guide.
Choosing the audio source: whole system or one app
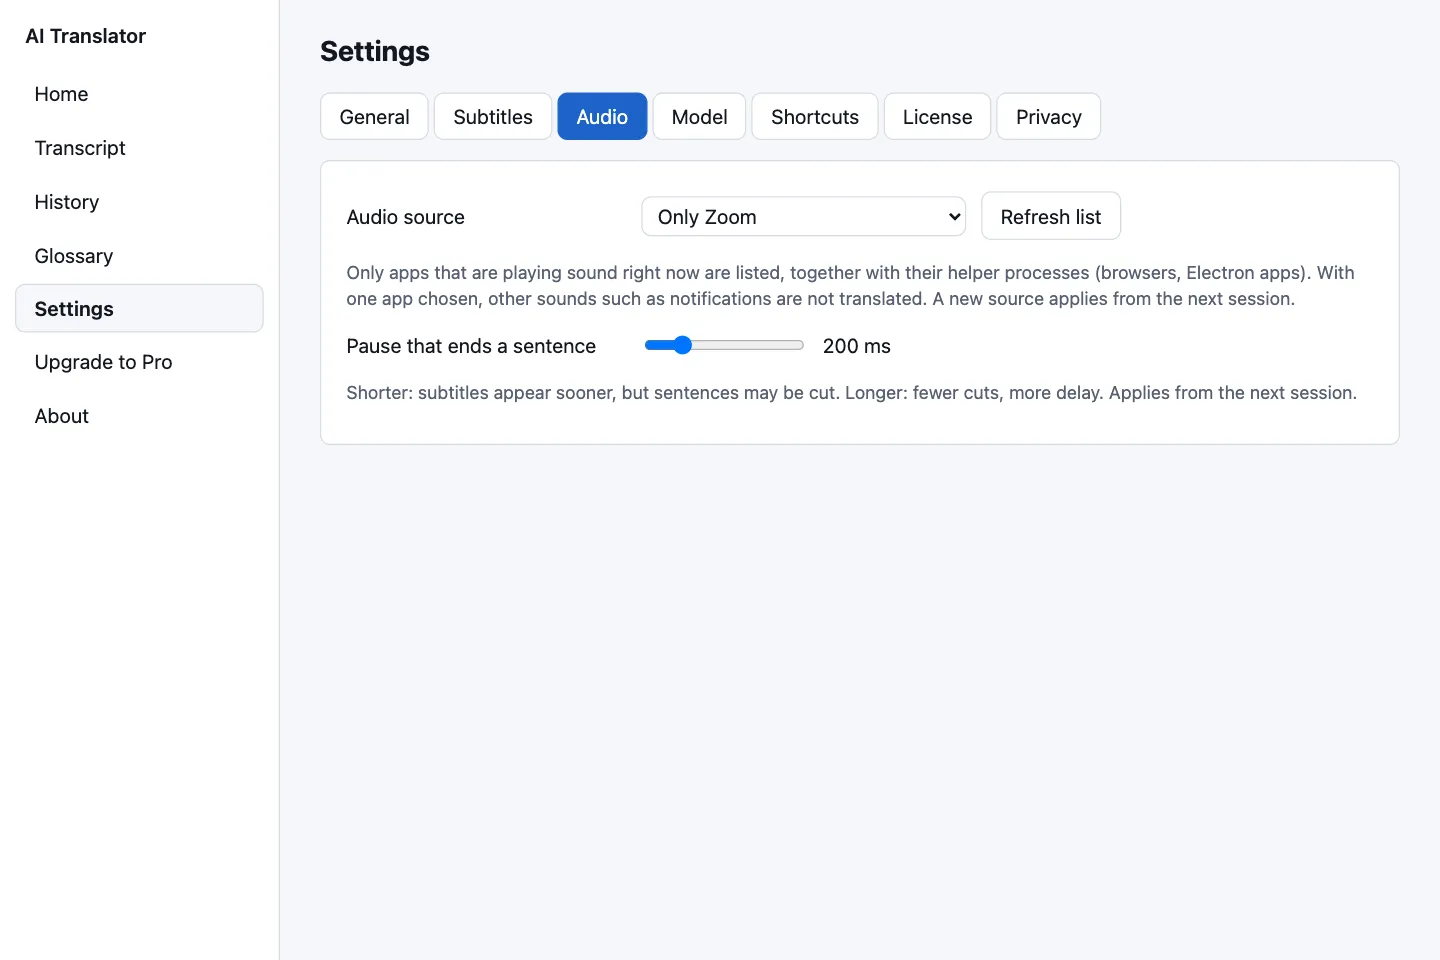
The permission covers both modes. Choose the mode in Settings › Audio › Audio source:
- Whole system, except this app (default): translates everything your Mac plays, including notification sounds.
- “Only” plus an app name: pick your meeting app. Other sounds, such as notifications, are not translated. Safari and web pages inside other apps are grouped as “Safari and web pages inside other apps”.
The list only shows apps that are playing sound right now; click Refresh list after your meeting starts. A new source applies from the next session. If the chosen app stops playing sound, the app says “The chosen app is not playing sound” and carries on as soon as it plays again.